
Record Elements of User Interface
Last Updated: May 10, 2022
Last Updated: May 10, 2022
You can start recording using any of the following ways:
Ensure that Developer Bot is running before starting to record the Application. To know more about how to start Developer Bot, click here.
.png)
A floating window of the Jiffy UILearn application opens to record the controls and actions performed on them in the application.
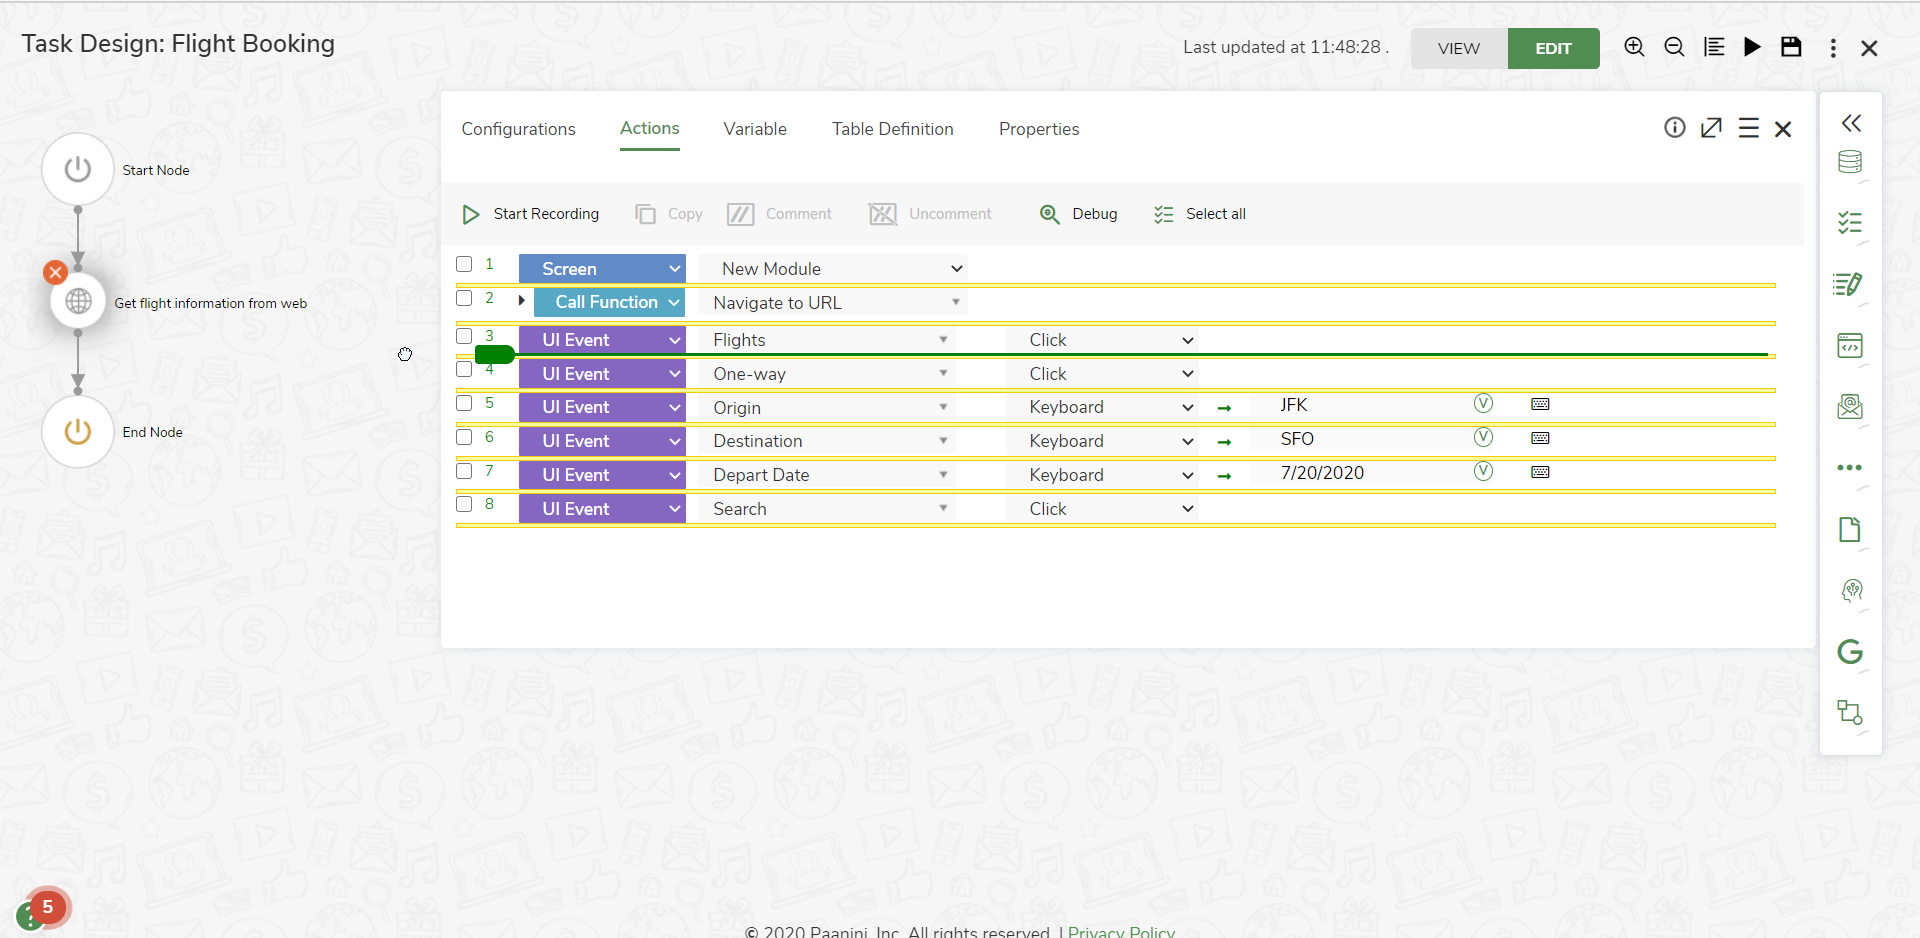
Ensure that the Application to be recorded is open before you start recording.
For the Flight Booking application, click on Flights, One way, Leaving from, Going to, Date of Departure, and Search options to record them.
.png)
If any of the UI controls are missed to capture, you can rerecord them.
Rerecorded UI controls get listed below the green line cursor.
You can record UI elements of Table, Text, and Image formats.
Use Text and Image recording only if you are unable to capture UI Controls correctly, using Control based recording and Dynamic control based automation.
This is applicable in scenarios where you need to record data in tabular format.
.png) Other Recording button.
Other Recording button..png) icon to record UI elements as Table.
icon to record UI elements as Table.For the first column, select two elements from the same column:
For the other columns, press the Ctrl key and select the first-row element of the columns to be populated.
The element gets highlighted in red and all the row elements of the recorded column are automatically displayed under the respective columns.
Ensure that the previously recorded column is recorded and loaded in UI Learn dialog box, before proceeding to record.
If tables exist across multiple pages in the website, click the ADD NEXT LINK button to record them.
Click the Add SCROLL LINKS button and select the scroll to be recorded if any scrolls to be recorded.
Rename the columns in UI learn floating window with intuitive names.
Click the DONE button to stop the learning process.
.png)
This is applicable in scenarios where you need to record a text field as Anchor and an image field as Target.
In a form where you need to enter text in a couple of user entry fields based on the labels, Text recording is used to record the label as Anchor and the user entry fields as Target entered in image format.
Other Recording button..png) icon to record UI elements as Text.
icon to record UI elements as Text.All the recorded controls are displayed in Jiffy UILearn floating window.
.png)
This is applicable in scenarios where you need to record the Anchor and Target fields as images.
In a form, where both the label and user entry fields are images, image recording is used to record both Anchor and Target as image.
Other Recording button..png) icon to record the image UI element.
icon to record the image UI element..png)
Click the Stop Recording button to stop the recording and save the UI controls.
All the recorded UI controls are listed under UI Controls tab.